Recipes
banana boats
by isabelle D. and skylar B.
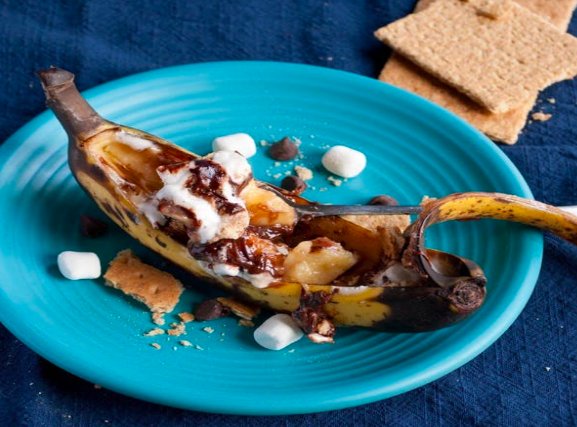
Banana boats are very delicious treats. It is fun to eat them on a camping trip because you can cook it on a fire (it’s really cool). If you try this treat you will not only love the taste, but you will also have fun making it whether you are with family, friends, or alone.
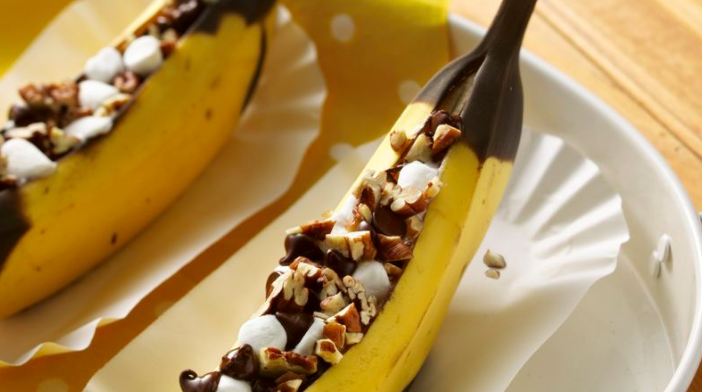
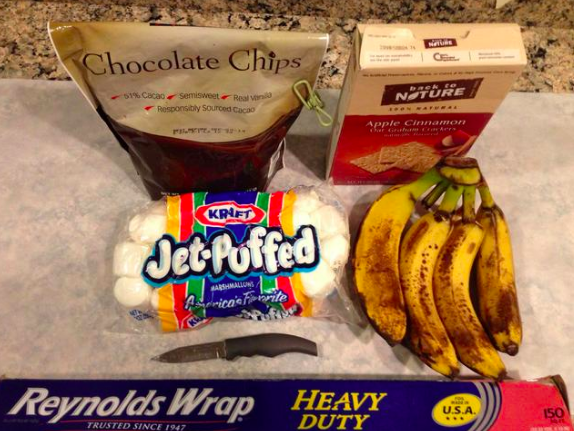
First, you need to gather ingredients such as: chocolate chips, marshmallows, graham crackers, and bananas. You will also need tin foil and a knife. Next, cut open a slit in the side of the banana, and fill it with marshmallows, chocolate, and crushed graham crackers. Then close the slit, wrap it in tin foil, and put in the oven for 20 minutes or you can roast it over a fire. Then the fun part happens… EATING IT!!!!! You can eat this any way you want but the best way in our opinion is with your hands. All in all, this is an amazing dessert and lovely treat, we hope you like it. Enjoy! ;)
Recipe:
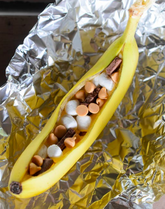
1. Cut banana peel lengthwise about 1/2 in. deep, leaving 1/2 in. at both ends. Open peel wider to form a pocket. Fill each with 1 teaspoon chocolate chips, 1 tablespoon marshmallows, and walnuts (optional).
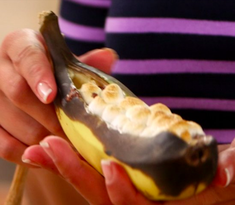
2.Grill, covered, over medium heat for 5-10 minutes or until marshmallows melt and are golden brown. Ask an adult for help before trying this part. Yield: 4 servings.
You can also see a video of the recipe here. Or, if you're looking for a recipe that doesn't use a grill, check out this video.
Recipe:
1. Cut banana peel lengthwise about 1/2 in. deep, leaving 1/2 in. at both ends. Open peel wider to form a pocket. Fill each with 1 teaspoon chocolate chips, 1 tablespoon marshmallows, and walnuts (optional).
2.Grill, covered, over medium heat for 5-10 minutes or until marshmallows melt and are golden brown. Ask an adult for help before trying this part. Yield: 4 servings.
You can also see a video of the recipe here. Or, if you're looking for a recipe that doesn't use a grill, check out this video.
|
Before made:
|
Before cooked:
|
After cooked:
|
|
|
|
|
Half eaten:
|
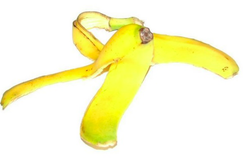
Fully eaten:
|
Tip: MUST be eaten with ice cream and graham crackers. We hope you enjoy!
A 3-Course Meal
by mikayla t.
|
Today you can learn how to make a full three course dinner with these recipes! These recipes should be easy enough for people ages 6+ to make.
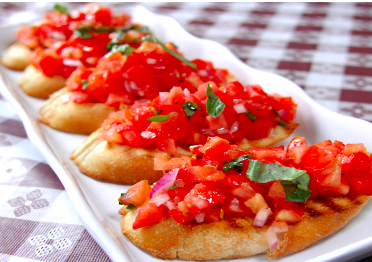
Bruschetta: Ingredients:
7. take a spoon of your bruschetta mix and dump onto your bread and take a bite. Enjoy! 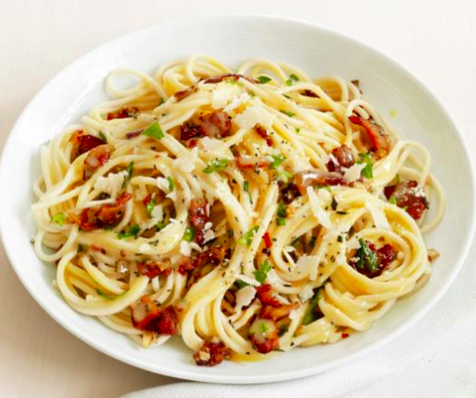
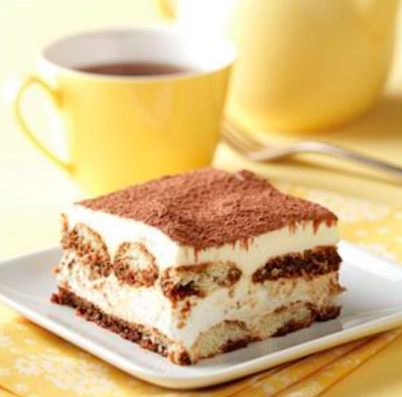
The third and final recipe you will be learning to make is tiramisu.
Ingredients:
2. In a medium bowl, mix cream with vanilla until stiff peaks form. Whisk mascarpone into boiled mixture until smooth. 3. In a small bowl, combine coffee and rum. Split ladyfingers in half and dunk them into you coffee. 4. Arrange half of soaked ladyfingers in bottom of a 7 by 11 inch pan. Spread half of mascarpone mixture over ladyfingers, then add half of whipped cream over that. Repeat layers and sprinkle with cocoa. Cover and refrigerate 4 to 6 hours, until set then serve. |
The second recipe I will tell you about is pasta carbonara:
The things you will need for this recipe are:
|
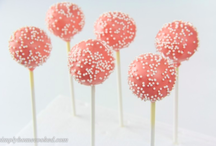
how to make pink vanilla cake pops
by presley p. and kate w.

|
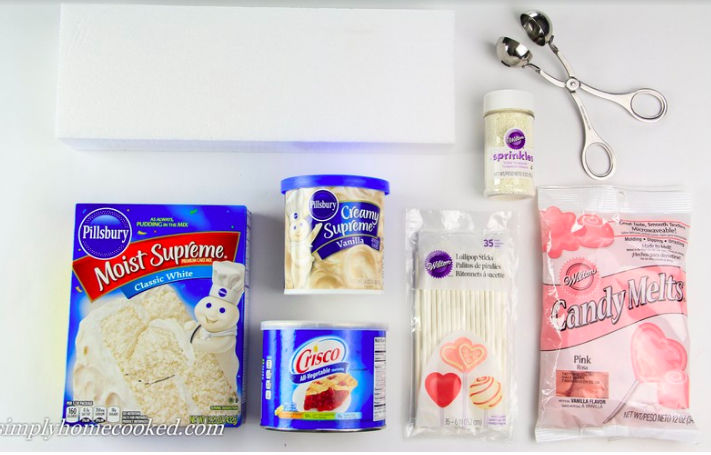
Have you ever wanted to make cake pops? Well we can show you, but first you need:
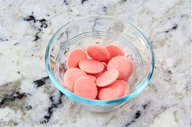
Candy Coating
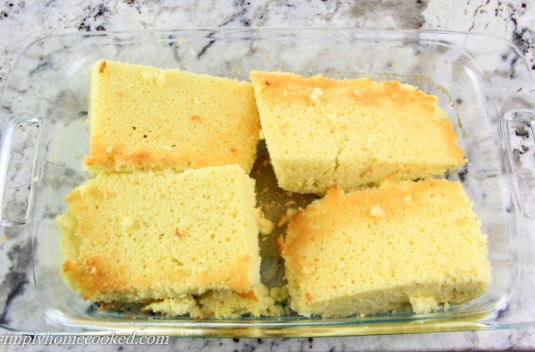
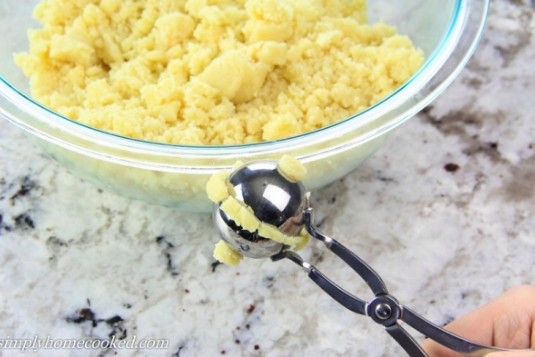
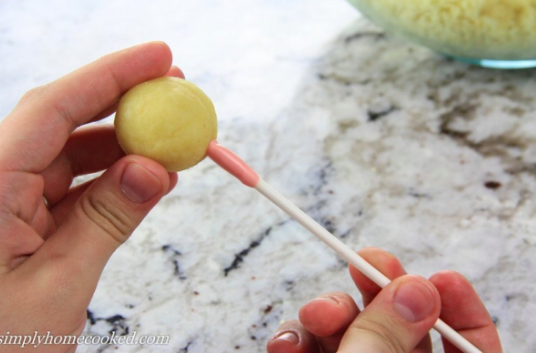
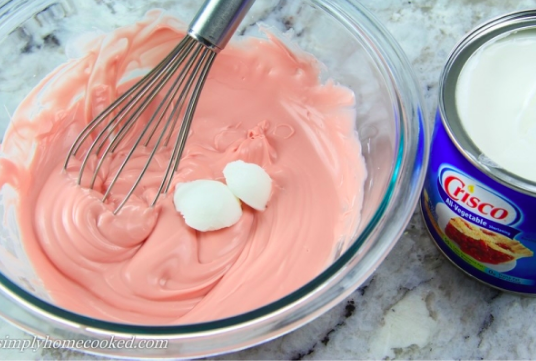
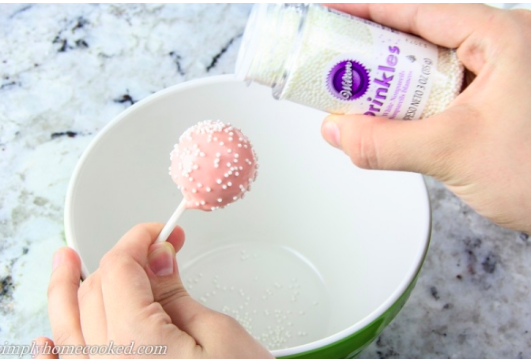
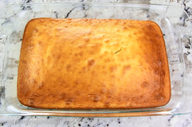
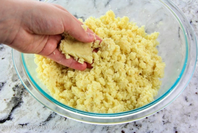
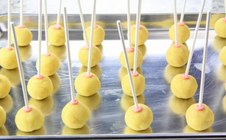
1. Bake the cake according to the package and let it cool down to room temperature. 2. Cut the cake into four pieces and peel away the browned outside layer of the cake. The reason to peel the outer layer because it usually dries and cannot be formed into the cake pop. 3. In a large bowl, crumble the cake with your hands. Add two tablespoons of any frosting to the crumbs, and mix it in. 4. Shape a ball and place it in the cake pop former. Make sure it is a little bigger than the cake pop former. When done, take off the extra cake from the sides, and roll the ball. 5. Melt about ¼ cup of pink candy melts in a bowl. Heat it for 30 seconds. Make sure not to overheat the candy. 6. Dip the tip of each cake pop stick into the melted candy and poke it into the end of each ball. Place each cake pop onto a baking sheet and move it into the freezer for about 20 minutes. 7. Meanwhile, melt the rest of the candy. Once it is well melted, add 1 ½ tsp. Crisco and mix well. Then pour candy into a tall cup. 8. Take out the cake pops after 20 minutes, and dip the pop into the cup filled with melted candy, and make sure it is fully covered. Then, pull up the cake pop. (Do not swirl the pop.) Hold the cake pop in one hand, and tap the stick against the cup so all the extra frosting drips off. 9. Sprinkle the cake pop right after you dip it so the sprinkles stick before the frosting hardens. 10. Place in a block of styrofoam and let it sit for about an hour. Makes 20 cake pops. Thank you to simplyhomecooked.com for the recipe and photos. We hope you make these delicious and cute cake pops. |
|
|
s'mores cake in a jar
by imogen b. and charlotte w.
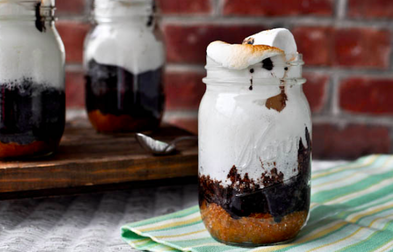
Are you one of those people that when you see chocolate or s'mores your mouth starts watering? Well, then run into your kitchen, preheat your oven and start baking this amazing s'mores cake in a jar! This recipe, though it may seem long, is easy for kids to make at home. We found the recipe S'mores Cake in a Jar at howsweeteats.com.
This recipe makes four 16-ounce mason jar cakes
For crust:
1 1/2 cups graham cracker crumbs
1/2 stick butter
Pinch of salt
Preheat oven to 350 degrees.
Melt butter and mix in graham crumbs and salt. Mix until moistened. Spray 4 mason jars with non-stick spray, and press graham crust into jars. I began by adding a tablespoon to each, and repeating until graham crumbs were gone. They don’t need to look perfect. I pressed the crumbs down firmly with the flat bottom of a clean screwdriver.
For cake:
1 1/8 cups all purpose flour
1/4 cup dark cocoa powder
1 1/4 teaspoon baking soda
1/2 teaspoon salt
3/4 cup brown sugar
1 egg
1 teaspoon vanilla extract
1/2 cup milk
1/2 cup + 1 tablespoon heavy cream
1/2 cup butter, melted
2 tablespoons sour cream
In a bowl, whisk egg and sugar until smooth and no lumps remain. Add milk, cream, butter and vanilla, and mix until combined. Stir in sour cream.
Sift dry ingredients together and add to wet mixture. Mix until batter is smooth. Using a 1/4 cup measure, add batter to mason jars one scoop at a time. You only want to fill them up about half way, and the batter should work evenly for 4 jars. Again – don’t worry if it is perfect.
Place mason jars in a baking dish and add about 1 1/2 cups of water to the bottom. Bake for 30 minutes, or until cake is set.
For topping:
1 bag of large marshmallows
Remove cake from the oven and press large marshmallows down on top, being careful not to burn yourself. There is no set number of marshmallows to use. I pressed down as many as I could, about 4-5 each. Heat the broiler on your oven and watching carefully, brown marshmallows for about 1-2 minutes, or until golden brown. Do not take your eyes off them! Serve as soon as possible
Notes
The recipe looks really long, but it is easy! When you put the marshmallows on top of the broiler and the marshmallows sink down to the chocolate cake, don't worry it’s normal. It's very rich and sweet, and that's what makes it a great dessert.
You can use other sized jars, but keep an eye on how much batter you use. If you have leftover batter make tiny cupcakes! S'mores Cake in a Jar at howsweeteats.com.
Three Awesome, Cool & Unusual desserts
By Elle H.
Do you want a new and exciting twist to your dinner table? Well, I’ve got news for you! Find all about these fascinating and wonderful desserts. This article includes recipes and links. How can you make them? You could make any of these yummy desserts at home, if you have the ingredients! Did you ever think about why I made an article about dessert? Why not dogs, or science, or maybe books and filming? The reason why I did this was for a few reasons that I think you might agree with. First, I was tired of the boring old store stuff. I wanted something homemade. (Even though lollipops are common, there are many different kinds of them.) Second, think about what you get for dessert every day. I wanted something new.
|
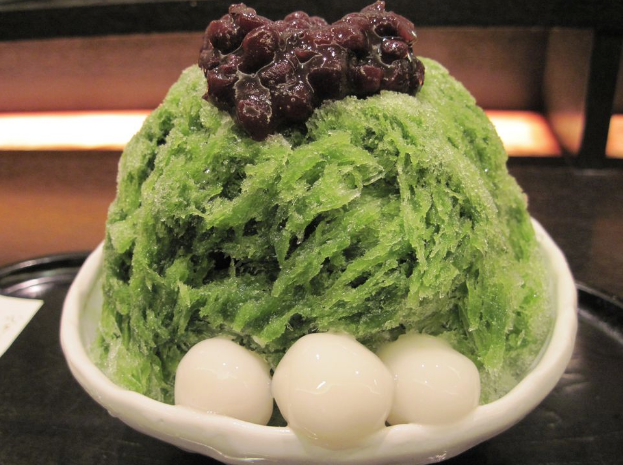
Kakigori
Kakigori is a wonderful dessert that is Japanese. You would usually eat it in the summertime, but it really depends on how you feel.This Japanese dessert is like shaved ice. You can put syrup and condensed milk on it. Kakigori is like the ‘sister’ of shaved ice. This dessert is usually served at local festivals in the summer. If you want to surprise your family with a little something, this is a great idea. Ingredients for one kind of this yummy delight: 2 tbsp Matcha green tea powder ½ cup 100 g. sugar 150ml boiling water Ice Directions: 1.Put Matcha powder and sugar in a mixing bowl, pour in boiling water, and stir well until dissolved. Let syrup cool. 2.Shave ice into a bowl to make a tall mound of shaved ice. 3.Pour 3-4 Tbsp of the Matcha syrup over ice, put Anko and Dango on top. Serve immediately. If you don’t know how to make Anko or Dango, click on the links to learn how. For Anko the main ingredient is red beans. You can get these at any regular store. For Dango, there are a few ingredients. Mochiko is rice flour. You would also need tofu and Anko. This was only one awesome kind of food dish that you all might like from this site. |
|
|
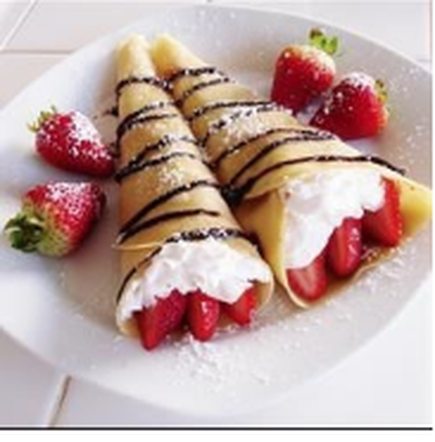
Crepes
You all probably know about crepes. They are a wonderful dessert for you. You put what you want on them. Many have fruits on top. Some even have nuts on them. But it is really your decision what you put on top and in the middle. Even put whip cream on it! Ingredients: 3 tablespoons unsalted butter, melted 1 cup all-purpose flour (spooned and leveled) 1/4 teaspoon coarse salt 4 large eggs 1 tablespoon sugar 1 1/2 cups whole milk Directions: 1. In a blender, combine flour, sugar, salt, milk, eggs, and butter. 2. Puree until mixture is smooth and bubbles form on top, about 30 seconds. Let batter sit at least 15 minutes at room temperature (or refrigerate in an airtight container, up to 1 day; whisk before using). 3. Heat a 12-inch nonstick skillet over medium. Lightly coat with butter. Add 1/3 cup batter and swirl to completely cover bottom of skillet. Cook until underside of crepe is golden brown, 2 to 3 minutes. 4. Loosen edge of crepe with a rubber spatula, then with your fingertips, quickly flip. Cook 1 minute more. Slide crepe out of skillet and repeat with remaining batter. (Coat pan with butter as needed.) When you are done with this, you can decorate as you want! Enjoy! Click here for some simple crepe recipes. |
|
Lollipops
Lolliops are yummy and delicious. Many people like to eat lollipops for a few reasons. First, they are long-lasting. They also have a good flavor, and some have gum inside. Ingredients: 1 cup sugar ½ cup light corn syrup ¼ cup water 1-1/2 tsp extract of your choice (vanilla, mint, cinnamon, coconut, etc) Food coloring (optional) Directions 1. Prepare your lollipop molds by spraying them lightly with nonstick cooking spray. Wipe out the inside with a paper towel, so that only the thinnest layer of oil remains. Insert the lollipop sticks into the molds. 2. Combine the sugar, corn syrup, and water in a medium saucepan over medium-high heat. Stir until the sugar dissolves, then brush down the sides of the pan with a wet pastry brush. Once boiling, insert a candy thermometer. 3. Allow to boil, without stirring, until candy reaches 295 degrees Fahrenheit (146 C). 4. Once the candy reaches 295 F, remove it from heat. Allow it to sit until it stops bubbling completely. Stir in the extract of your choice, and, if desired, food coloring. 5. Spoon the candy into the mold cavities, making sure to cover the back of the stick. 6. Allow to cool completely and remove once hardened. 7. Store lollipops individually wrapped, in an airtight container at room temperature, for up to a month. This yummy, yummy and breathtaking dessert will make your family go Wow! Recipe source: https://www.thespruce.com/lollipops-521375 |
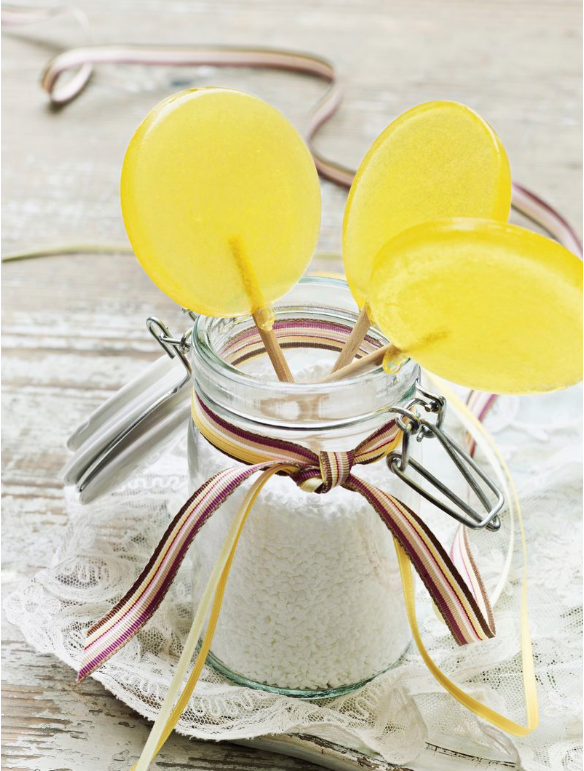
Lollipop molds & sticks
|
I really hope that you enjoyed these different foods and recipes. I certainly did. If you have time at home to make a different dessert, please make an article about it. Maybe you can even surprise your parents with this. I hope you enjoy all of the different and unique desserts in the world.
DIY Fun Recipes
By Olivia H. & Michelina H.
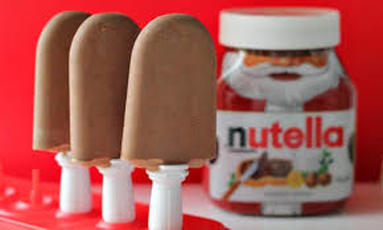
Doesn’t everyone like Nutella and fun treats? Well, here are some amazing DIY treats you can make at home right now! It is very easy, and there is no hard work needed. If you like Nutella and treats, this is the article for you. So just get comfortable and read. And all the recipes and videos here are very easy to make and watch at home! We also have this cool DIY Giant Lollipop video for you to watch and a survey right down below with pictures of delicious treats, too. We hope you enjoy!
Here are some fun facts that you might want to know. First of all, Nutella is the brand name of an Italian sweetened hazelnut cocoa spread. Also, did you know that World Nutella Day is February 5th? WOW! If you want to see more just click here.
Here are some fun facts that you might want to know. First of all, Nutella is the brand name of an Italian sweetened hazelnut cocoa spread. Also, did you know that World Nutella Day is February 5th? WOW! If you want to see more just click here.
|
Nutella Ice Pops
Takes about 3 hours and 10 minutes! Ingredients: 1 cup of whipped cream ¼ cup of Nutella ½ cup of whole milk Directions: 1. Blend whipped cream, milk, and Nutella in a blender until smooth and thickened (it takes about 2 minutes) 2. Pour mixture into ice pop mold, freeze until solid ( at least 3 hours) Recipe source |
|

|